Tuesday, April 30, 2013

Make Your Own Plarn: Plastic Yarn from Shopping Bags and 6 Crochet Projects


Plarn is made from Plastic Shopping Baags
Hi, You Crafty People, welcome to our little blog. Come with me. 

I want to share something with you. 

Have you ever heard of Plarn? The first time I heard about it was a few weeks ago and I would like to now share my new found knowledge with you. 

Plarn is short for plastic yarn. You don't have to buy it. You need to make it.


Now let's take a look and imagine the possibilities with this cute project.


Making Plarn

Cutting The Plastic Bags

This part of the tutorial will show you the first step in converting ordinary plastic bags into plarn. What a weird word.


Tie the Strips Together


The result is short plastic loops that are joined together into one long continuous strip for crocheting, knitting, or weaving.

Plarn Projects

A small bowl from plarn Water Bottle Bag Made From Plarn Sandals made from Plarn Hat made from plarnPurse made from Plarn Mat made from plarn.


Are you thinking about making some plarn? Is your mind spinning with the possibilities?


If you would like to receive our blog updates please subscribe via email or follow us on Twitter, Pinterest or Blog Lovin. And feel free to share this post with anyone and everyone. Thanks!


Well, thanks for stopping by and have a fantastic day.

Sunday, April 21, 2013

DIY Clothes Pin Magnets


Hi, You Crafty People, welcome to our little blog. Come with me. I want to share something with you that Cole has been working on.


This week we are featuring DIY Clothes Pin Magnets. It was first posted on Young Mommy Memoirs in March 2013.


Now let's take a look and imagine the possibilities with this cute project.


CLOTHESPIN MAGNETS


These cute clothes pin magnets are so easy to make!


Materials

  • Wood Clothes Pins
  • Paint - colour of your choice
  • Paper - coordinating pattern with paint colour
  • Magnets
  • White Glue

All you need are wooden clothespins, paint, white glue, paper and magnets.Nicole decided to paint these clothespins pink and yellow, and added cute small floral pattern paper for a cute cottage chic, springtime look.


Directions

  1. Paint your clothespins, if you'd like. Plain ones look really nice, too.
  2. Cut your paper to fit the top of the clothespins.
  3. Once the paint is dry, glue the paper onto the clothes pin with white glue.
  4. Stick a magnet strip on the back.
  5. And you're done!


Are you thinking about making your own Clothes Pin Magnets? Or do you have a different idea for hanging your important papers on the fridge? We would like to read your ideas.


If your interested, stop by one or both of our Etsy Shops, Little Shop of Treasures or Amity Arts and Crafts or check out this free printable calendar.

If you would like to receive our blog updates please subscribe via email or follow us on Twitter, Pinterest or Blog Lovin.


**********************************************************


This project has been featured at the Pursuit of a Functional Home Pin It Blog Hop. Thanks so much Judy.


Jenna also featured this post on her blog, Rain On A Tin Roof. I am so grateful .


********************************************************

Well, thanks for stopping by and have a fantastic day.

Saturday, April 13, 2013

DIY Hemp Bracelets


Hi, You Crafty People, welcome to our little blog. Come with me. I want to share something with you that Cole has been working on.

This week we are featuring a DIY Hemp Bracelet. It was first posted on Young Mommy Memoirs.


Now let's take a look and imagine the possibilities. 


Materials for DIY Hemp Bracelet

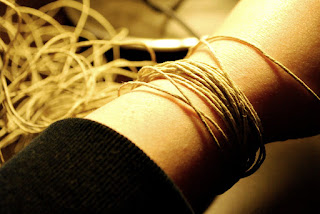
I'm a huge fan of hemp because it's eco-friendly, natural, vegan, durable and nice looking. However, any type of cord can be used for this as long as it's about 1 mm thick.

And the fun part - selecting the beads you want to use! Keep it clean and simple with pretty white beads, or mix it up with some funky colours, shapes and sizes! 

The materials you will need are:
  • 1 mm Hemp 
  • Small beads of your choice
  • Scissors
  • Fabric Adhesive (or White Glue will work)


Instructions for DIY Hemp Bracelet

1. After you have selected your cord, and the beads you want to use, it's time to decide on how long you want it. The way I do this is by wrapping the cord around my wrist. I wrapped mine around my wrist 18 times.


2. Next, you start putting your beads onto the cord. It doesn't matter how many you put on, if you need to put more on after you start you can. I did mine 5 seed beads, 1 blue, 7 seed beads, 1 blue, repeat.  I find that making it too even makes the larger beads cluster once you've wrapped it around your wrist to wear.


3. Now that your beads are on, you can start tying knots between them. The space between the beads is up to you. I seem to like tying the knots 2  cm apart. I tie the knots right up against my larger beads though. This part can be time consuming depending on how long your cord is, but how easy is tying knots? Right?


4. Once your beads are all secured in between your knots, you can attach your lobster claw on one end, and a little loop on the other end - both tied off with double knots. To make sure they don't come apart, I recommend adding some fabric adhesive. I also like to twirl the excess cord around a couple times, then adding more fabric adhesive. But you really don't have to.


And there it is, a cute bracelet. Or you can use it as a necklace or anklet as well. Mix it up!

Or if you don't enjoy making your own jewelry but like the look of these bracelets, you can purchase them at my shop Amity Arts and Crafts.

Have you tried your hand making a hemp bracelet? I know Cole really enjoys making jewelry. 


***************************************************

This was quite a surprise to me. I found this post featured by Loraine Brummer on Squido. The title of her Lens is All Teacher Gift Crafts. It's a fantastic round up. You should check it out HERE.


***************************************************


If your interested, stop by one or both of our Etsy Shops, Little Shop of Treasures or Amity Arts and Crafts or check out this free printable calendar.

If you would like to receive our blog updates please subscribe via email or follow us on Twitter, Pinterest or Blog Lovin.

Friday, April 5, 2013

How to Make Your Own Rag Rug This Weekend.


Hi, You Crafty People, welcome to our little blog. Come with me. I want to share something new with you. Well new to me anyway.


This week I am featuring a DIY Rag Rug. 
Now let's take a look and imagine the possibilities.


Rag Rug Inspiration


I can’t remember when I decided to try my hand at making a rag rug – suffice it to say it has been a very long time.


Seeing all these wonderful crafts on the net has inspired me to get busy. And it just so happened that I was going through my granddaughters clothes, removing items that are too small or too stained or have rips when it hit me – I can use these to make my rug.


I have the motivation. I have the material (t-shirts.) I have the right tools (my hands and a big crochet hook.) Let’s get started!

Cutting The Material Into Strips

My first challenge was to figure out how to get the longest strips possible from the garments. The fewer joins the better – I think so anyway. Joins can be lumpy.


The first step is to cut across the shirt from armpit to armpit in a straight line through both layers.


Cut 1 ½” strips horizontally across the shirt 
through both layers but be sure to not cut all the way across. Stop about three inches before the end of the opposite edge. 


Open up shirt so you can see the whole uncut edge. 
Cut diagonally from the second row to the first row only through the top layer. 


Continue cutting diagonally until you have completed the whole piece and you have one long continuous strip. 


Joining the Rag Strips

I didn’t join all the strips at once. I choose the next strip as I finish crocheting the previous strip. This gave me the freedom to choose the best colour and texture in comparison to the strips already crocheted into the rug. 

My Granddaughters’ clothes are very colorful and they actually coordinate well together with the pinks, purples, blues and whites. Very pretty.

This is how I joined the strips. 

I cut a small vertical slit near the end of the first strip (blue). I make it just big enough to get my crotchet hook through. 


I cut a small vertical hole on the second strip (pink). 


Push your crochet hook through the hole in the first strip(blue). 

Push your crochet hook through the hole in the second strip(pink). 

Pull the second strip(pink) through the hole in the first (blue) strip. 

Now pull the second (pink) strip through the hole in the second strip – pull all the way through. 

Pull tight. A nice neat join that won’t ever come apart. And a smaller lump in your rug than if you tied it. 


Decide Which Type of Rag Rug to Make

Now I know there are many ways to make a rag rug so I had to decide which style I was going to make. 

  • I could braid the material strips together then sew the braids together forming a circular rug. 
  • I could weave the strips together in a make shift loom. 
  • I could crochet around the strips with yarn
  • or I could actually crochet the material strips. 

I decided to crochet the material strips to make my rug. I like crocheting and sewing pieces together seemed a little too tedious for me. I also thought that crocheting the rug would make it more durable.


Crocheting My Rag Rug 

  1. I started by chaining five. 
  2. Joined it to make a circle. 
  3. Single crochet into each loop. 
  4. Insert additional stitches as required making rounds. 
  5. Too many stitches will leave a ripple. 
  6. Too few stitches will cause the rug to curl up. 
  7. Continue making rounds until desired rug size is acquired. 
  8. Tie off tail and pull tight. 


Ta Dah! My Completed Rag Rug


Yep it’s that easy. I can’t believe I finally made a rag rug. After all these years of just thinking about it. Well I actually have the time right now.
I can see the clothes my granddaughters wore when they were four years old, woven into this rug. 

This colourful rag rug would look fantastic in a little girl’s room. As I was crocheting , I pictured a little girl getting out of bed, her little piggies stepping down on this pretty rug that I made with her in mind. 

I already started my next rag rug.


Creating and fun are always in fashion.


The hardest part of it was cutting the long strands. The scissors gave me blisters when I made the first rug, but now they've toughened up and can take the hours and hours of abuse. Maybe not that many hours.

The second rug I made was from sheets. I did't have to cut the whole length, just start it then tear it. My granddaughters enjoyed helping me this part. They took turns pulling and walking to rip the strip off.

I know you can use just about any kind of material to make a rag rug. I think I read somewhere that a lady made one out the upholstery material from her old couch. That's fun - ripping the material off my old furniture. I did it years ago to reupholster my couch and chair. Silly me just threw all that wonderful material away when I could have made a rug. I wasn't a hoarder back then. LOL


Have you tried your hand making a rag rug? I really enjoyed making this rug. In fact I am already working on my third rug. 


Well, thanks for stopping by. I hope my instructions were clear enough.

If your interested, stop by one or both of our Etsy Shop, Little Shop of Treasures or check out this free printable calendar.

If you would like to receive our blog updates please subscribe via email or follow through one of the other social medias.


Before you go, I would like to share this wonderful news with you. Over eighty posts were submitted to Bowdabra's Saturday Crafty Showcase. This one was chosen with 13 others by the Bowdabra Design team as their favorite Eco-Friendly Projects to be featured on Friday's Showcase.


Thanks again for visiting, and have a fantastic day.